Can I Dismantle Sony Rear Video Projection Tv and Reassemble It to Work Again?
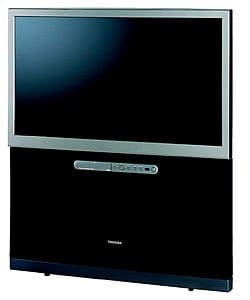
Toshiba 50 inch Projection TV Model 50H82
Introduction
Do you have big screen projection TV that you want to get rid off? This instruction will give you lot a guide on how to suspension down and disassemble a projection TV into manageable pieces for disposal at a dump or landfill where the pieces and components tin can cleaved down further and accept a chance for recycling.
This article with photographs uses a Toshiba 50H82, a fifty inch project TV as a model. This Boob tube had movie quality issues and repairs would cost almost the toll of modern flat screen TVs. Large projection TVs are bulky and heavy. Getting rid of them tin can be expensive because the new High Definition TVs (HDTV) are cheap and nobody wants the massive project TVs anymore. These beasts accept up too much infinite. (Meet Fig 1)
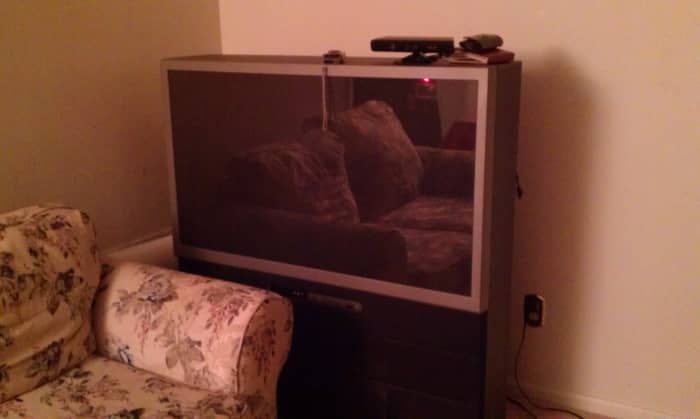
Fig 1. A Large Screen Projection Tv Hogging Up Living Room Infinite.
Romian1
Dismantling TV Overview
In my opinion, breaking downwards the Toshiba was not difficult. The design was user friendly for internal access. All the same, the case effectually the main components was glued. But I have a solution for destruction.
The TVs of today that uses LCD or LED technology are very lightweight. Even though I purchased a 50 inch LED Tv with someone to help me, I really didn't need the assistance. The box is large but there were two straps to handle and conduct the box. I am not that strong but I was able to lift the box and move it effectually by myself without any issues.
Older Tv use cathode ray tubes (CRT) to provide video and at that place have been large CRT TVs made to provide screen sizes upwardly to 36 inches. All the same, newer technology came around to back up fifty-fifty larger screen sizes to provide a big screen moving-picture show experience. One of the technologies that became pop during the late 90'southward to early 2000's, were the Projection TVs. There were two types of project TVs in the market: front and rear. A rear projection TV looks more than like a standard telly.
The rear projection TV contains a ruddy, light-green, and blue (RGB) projector, which produces the images to the back of the Boob tube. This projector can exist CRT, LCD, or DLP. The Toshiba 50H82 model uses CRT projectors. The back of the TV contains a mirror, which receives the picture which combines the RGB colors into whatsoever colour from the original pic source (from cable, satellite, disc, and so on). The image that is projected to the rear mirror is what the viewer sees in the front screen.
Training
Kickoff, move the projection TV to a place where you can go muddied and make a mess. I used the living room at first to only remove all the heavy parts prior to moving it to a final disassembly surface area. In this case, I used my garage.
Gather all the tools needed to open upwards the example and remove components like large circuit boards. In the Toshiba 50H82, there were lots of pocket-sized slotted lag screws. I used a cordless drill with an attachment to remove them.
Be mindful of whatever loose parts like screws or droppings flight from using brute force during your work.
Remove Back Panel
I started the work behind the TV. There is a console to access the large main circuit lath. Unscrew the bolts or screws and remove the panel. (See Fig 2)

Fig two. Removing the Back Panel
Romian1
Disconnect Power Cord
At that place is a power cord connection that was non accessible with the dorsum panel in the fashion. With the dorsum panel removed, you tin can see that the ability cordis connected to the principal board. Disconnect to get the cord out of the way. (Come across Fig 3)
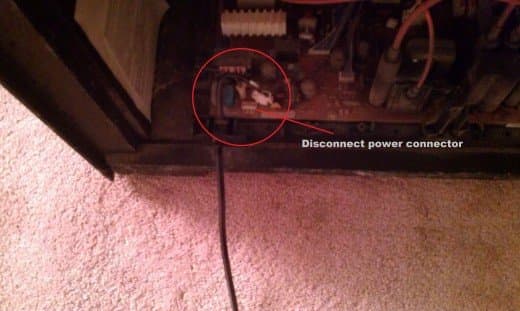
Fig 3. Disconnecting Power String
romian1
Loosen Main Printed Circuit Board (PCB)
Locate any screws that fasten the main board to the base of the TV. Unscrew all of them until you observe that the main board is loose. Once the board is loose, y'all can starting time disconnecting all the wires. (Come across Fig iv)
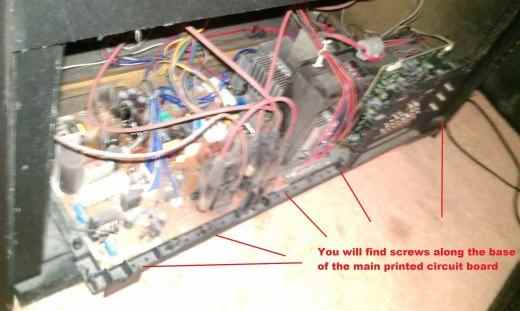
Fig 4. Loosening Main PCB
Romian1
Disconnect Any Cables and Wires from PCB
Annotation in the pictures (Fig 5a and 5b) that there are several cables and wires continued to the main board. You lot can only cut them with wire cutters or scissor or disconnect by hand. I started disconnection by hand in instance someone wanted to put the Television set together again. After running into some connectors that seem impossible to remove, I just outright cut them.
I imaging some scavenger trying to put this TV together and so I thought I would brand it like shooting fish in a barrel to put back together. Unfortunately, the connectors were so stuck and I was running out of patience.
Whorl to Continue
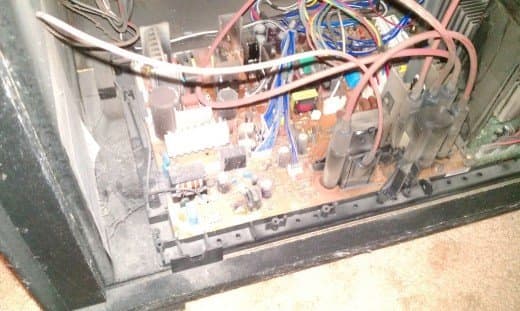
Fig 5a. Wires and Cables on Left One-half of PCB
Romian1
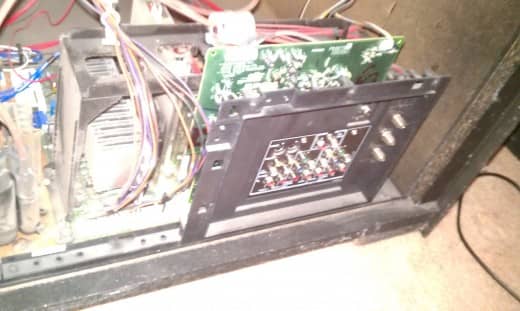
Fig 5b. Wires and Cables on Correct Half of PCB
Romian1
Put PCB Bated
Subsequently separating the cables from board, you lot tin put it aside to piece of work on the next pace. (See Fig half dozen) As you lot can see information technology is quite big for a PCB.

Fig six. Primary Power Board Removed
Romian1
Remove Front Panel
For the next stride, I opened up the front end bottom panel. I had the pry this embrace from the side with a screwdriver. Once I got one area loose, I was able to piece of work my style in separating the console from the Tv set. (Encounter Fig 7)
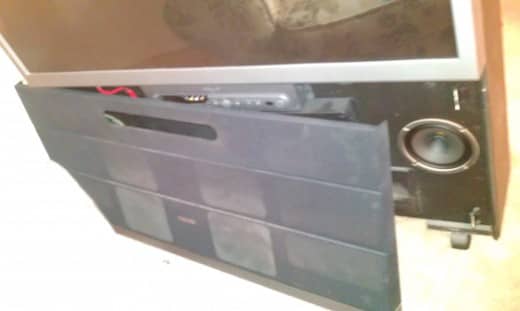
Fig 7. Removing Front Panel
Romian1
Removing Heart Panel
There was another panel in the middle to access the RGB projectors. Unscrew and remove this cover and betrayal the projection system and associated circuit boards. (Meet Fig 8a and 8b)
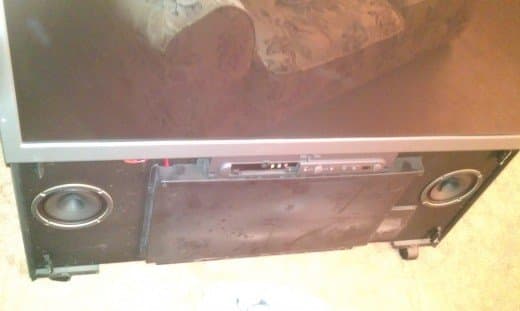
Fig 8a. Removing Center Console Nether Front Panel
Romian1
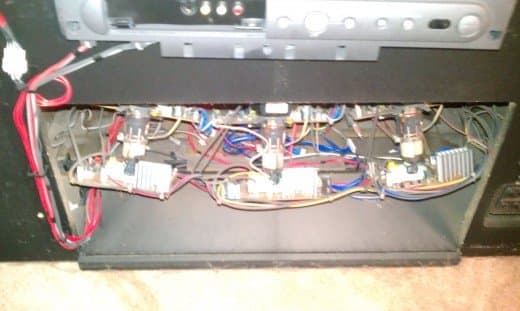
Fig 8b. RBG Projection Assembly Exposed
Romian1
Remove Front Screen Part 1
We will demand to remove the RGB projectors from the top. However, the big front screen is in the way and has to exist removed. Ensure the big plastic piece holding the screen is unscrewed from the lesser.
This large screen slides up for removal. There are four 'hooks" that hold the screen in identify. (See Fig ix)
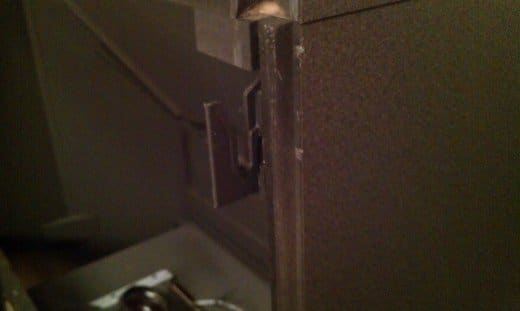
Fig ix. One of iv Hooks Belongings Upwardly Front Screen
Romian1
Remove Front Screen Part 2
Catch the plastic slice from the bottom and elevator upwardly. The large screen is bulky only not heavy. Put the screen aside and out of the manner. You volition see a huge area for the projection of image going onto a large mirror on the inner back of the Television set. (Run into Fig ten)
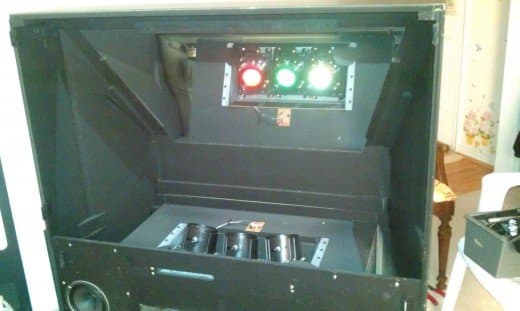
Fig 10. Screen Removed Showing Large Mirror Behind
Romian1
Unscrew RGB Projector
Locate the screws that are holding the Red Greenish Blue (RGB) projector assembly from the meridian. (See Fig 11) Unscrew the projection arrangement and ensure no wires are continued to the rest of the TV. If in that location are whatever connected wires, detach or cut.
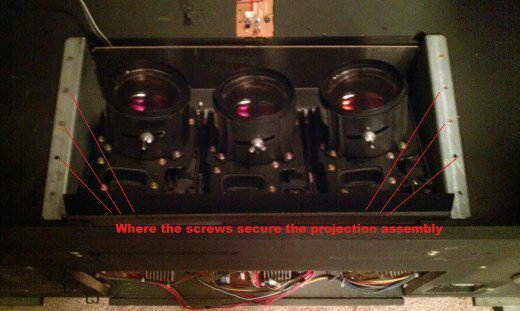
Fig eleven. Location of Screws Holding Projection Assembly
Romian1
Remove RGB Projector Assembly
The RGB projector assembly was the heaviest slice other than the large Telly body. (Run into Fig 12) Put this piece in a box because there are many precipitous edges that could hurt y'all. Put the box and the projector assembly out of the way.
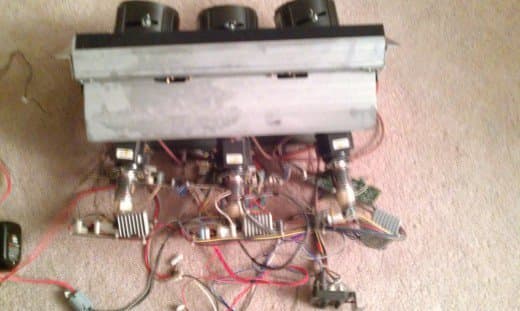
Fig 12. RBG Assembly
Romian1
Remove Speakers
The left and right speakers are held with iv screws each side. Remove the speakers to lighten the Television receiver. (Fig 12.five)
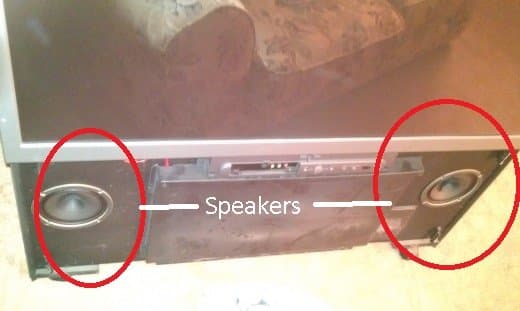
Fig 12.five. Remove Speakers
Romian1
Nifty the Housing
Even with the main excursion board, front screen, RGB projection associates and speakers removed, the hollowed out TV is still heavy and very bulky to put in a small truck. However, the TV is lighter for moving. Y'all tin can now put the big TV in a big truck or van and get rid of it.
Y'all now have the option of disassembling the TV body even further to transport the pieces in a small SUV or car.
The problem with the rest of the Toshiba 50H82 Tv set is that at that place are no other areas to unscrew. The remaining pieces are glued together. Brute force will be needed to suspension the residual but there is a big glass mirror to bargain with.
The mirror slides out upwardly only the top of the TV is glued and in the style. I took a large heavy duty hammer to separate the left and right sides from the Idiot box. The hammer I used is not the blazon used for removing nails on the other side of the tool. That hammer is too weak. I used the hammer akin to a small sledgehammer like the one Thor uses. (See Fig thirteen)

Fig xiii. Heavy Duty Hammer
Romian1
Remove Mirrow
After removing the pinnacle, I was able to slide the large mirror out and put it aside. (Come across Fig 14)
Warning: This is glass. Be cautious when handling!
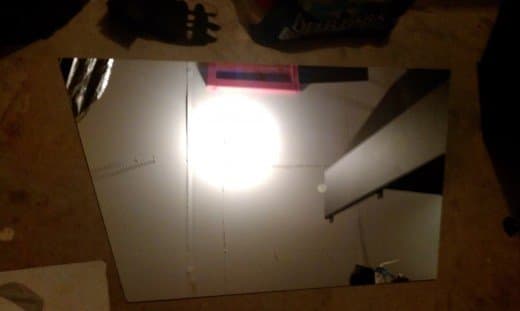
Fig 14. Large Mirror
Romian1
Breaking Housing Downwards Even More
I started removing the left side and correct side with the hammer. After removing a few more odd particleboard pieces, all that was left is a piece that looks like a cabinet or table on wheels. (Come across Figures 15 and sixteen)
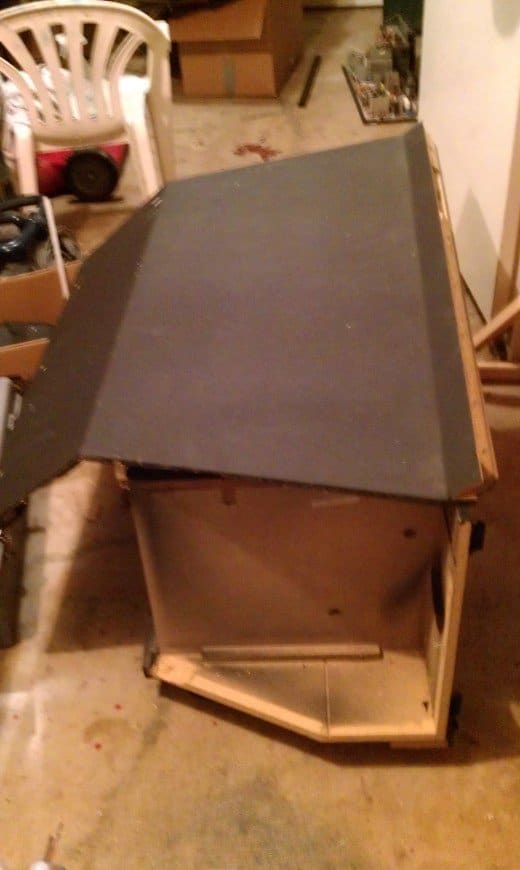
Fig fifteen. Removing Particle Wood Board
Romian1
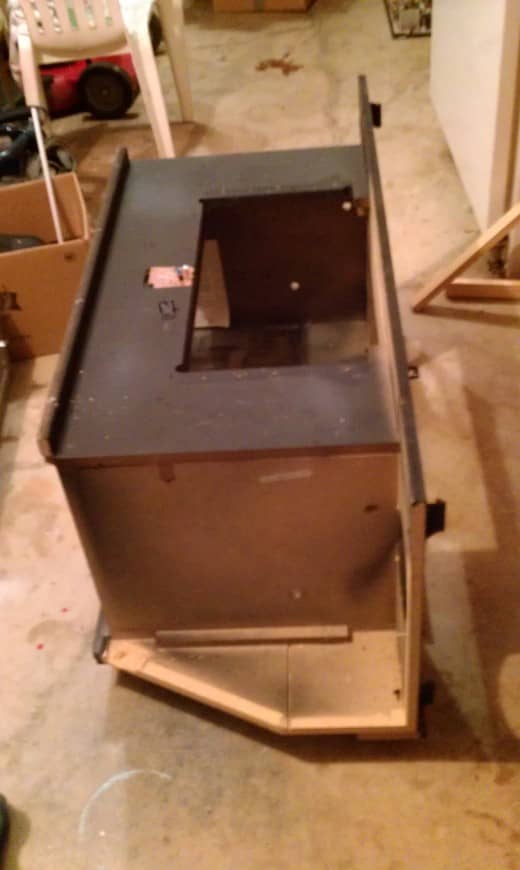
Fig 16. Cadre of the Television
Housing Core
Recycling Ideas
Later on making the big wooden pieces pocket-size enough to fit in your van or truck, you can neatly stack the pieces in the vehicle and transport to your local landfill.
If you desire, the particleboard scrap wood can be reused for making furniture. The husk of the TV's cabinet can be converted to a tabular array or cabinet for the new TV.
Epilogue
The Toshiba 50H82 50 inch rear projection Television receiver has sentimental value. I purchased this Tv set around 2002 after my 2d kid was born and I knew I would be at home more to intendance for them. Having large high definition Telly fabricated entertaining kids and guests more fun.
Ten years later, the video started to get fuzzy. I was not able to play whatever panel games like Nintendo Wii and Xbox 360 anymore. It would price approximately $100 dollars just to take a technician just to come to the house to troubleshoot.
Leaving this goliath TV on the curb is just an eyesore. With HDTVs relatively cheap, why would anyone want an old projection TV that does not work correctly?
Good day, Big Screen Projection Television. You served a purpose well merely newer technology has taken over. I mean some new TVs do not even acquit the erstwhile RCA component or S-Video connectors anymore. HDMI connectors have taken over. Makes me wonder what the next x years will bring with regards to television tech.
© 2012 Romian1
randy on July 23, 2020:
YES! Exact Telly was given to me 10 years agone, and at present no longer functions. Taking it apart today. Thanks for this! Interesting that i may get a new TV correspond my HDTV.
Bob on March 06, 2020:
Thanks! I had the exact aforementioned brand and model that had to come out of a basement after 18 years. Your guidance was very helpful!
Romian1 (author) on January fifteen, 2020:
Cooled past a liquid? They must accept some really practiced seal to preclude leaking and evaporation.
John on January 11, 2020:
My Hitachi 57 inch was withal working fine merely was getting fuzzy after 16 years. I suspected it had dust inside somewhere. Turns out after tearing information technology apart Information technology had grit on the lenses that I could have cleaned off had I known how to properly disasemble it. I salvaged a few parts I'one thousand certain I don't demand like the projector lenses. I thought it was interesting that the lamps were cooled by a liquid and in that location was a rubber float on the side of the estrus sink housing to allow for expansion and contraction of the liquid. It was a realy skilful tv and served me well except for damaging my shoulder while moving it about 12 years ago.
Romian1 (author) on November 22, 2019:
Glad I could help. I knew others will be in the same situation.
Romian1 (author) on November 22, 2019:
Glad I could help. I knew others will exist in the same situation.
Betty on November 19, 2019:
Thank you soooo much! I've been trying to push this 65" piece of Sony "furniture" effectually in this room, knowing full well that there was no style to go it out in ane slice. (Information technology took three delivery men, back effectually the tardily '90s, to get it in the business firm. And, they dropped the first i off the porch, had to go dorsum and go another 1, and one of them injured his back getting it in. I'one thousand solitary with this monster at present, and I'm a 70 twelvemonth sometime woman. However, I practice some carpentry, haul and shovel rock, pull up fences, and clear cutting wielding a 40 pound saw. I'm 5'three" tall and weigh 110 lbs, and my "opponent" weighs in at effectually 300lbs., is an inch or two taller than me, and is 65" wide. Now, thanks to yous, I might very well get it out of here earlier they bring the new ane!
Thanks again
Glen Williams on November 05, 2019:
I Have to thank you for the instructions it went well Thanks Glen
gloriakolb@gmail.com on Nov xiii, 2017:
how do I take down a 52" tv on the wall mounted frame?
wakehurstwilapplen.blogspot.com
Source: https://discover.hubpages.com/technology/How-to-Disassemble-or-Break-Down-a-Large-Projection-TV
0 Response to "Can I Dismantle Sony Rear Video Projection Tv and Reassemble It to Work Again?"
Post a Comment